问题一至问题十
问题一:通道交换
读取图像,然后将 '$ \text{RGB} $' 通道替换成$\text{BGR}$通道。
Answer
#include<opencv2\core\core.hpp>
#include<opencv2\highgui\highgui.hpp>
#include<opencv2\opencv.hpp>

using namespace cv;

Mat RGBToBGR(Mat mat) {
    int height = mat.rows;
    int width = mat.cols;
    Mat result = Mat::zeros(height, width, CV_8UC3);
    for (int y = 0; y < height; y++) {
        for (int x = 0; x < width; x++) {
            result.at<Vec3b>(y, x)[0] = mat.at<Vec3b>(y, x)[2];
            result.at<Vec3b>(y, x)[1] = mat.at<Vec3b>(y, x)[1];
            result.at<Vec3b>(y, x)[2] = mat.at<Vec3b>(y, x)[0];
        }
    }
    return result;

}
int main()
{
    Mat img = imread("C:\\Users\\PC\\Pictures\\1.jpg");
    imshow("原图", img);
    imshow("question_1", RGBToBGR(img));
    waitKey(0);
    destroyAllWindows();
}
Show
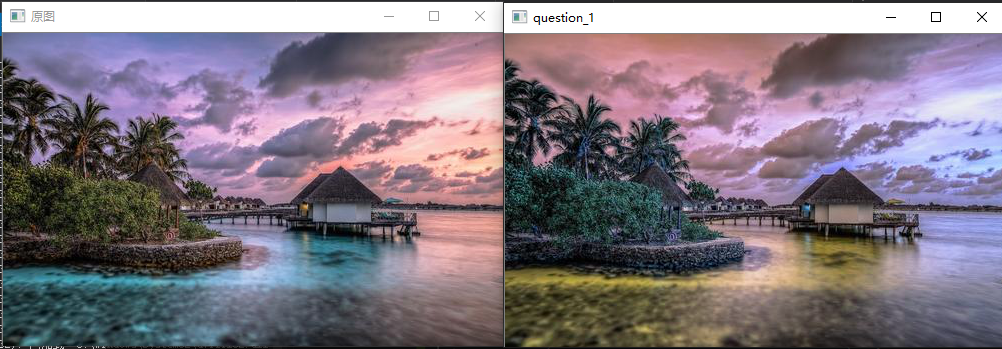
Note
- 类
Vecused as element of multi-channel images
问题二:灰度化(Grayscale)
将图像灰度化吧!
灰度是一种图像亮度的表示方法,通过下式计算:
$$Y = 0.2126\ R + 0.7152\ G + 0.0722\ B$$
Answer
#include<opencv2\core\core.hpp>
#include<opencv2\highgui\highgui.hpp>
#include<opencv2\opencv.hpp>

Mat toGray(Mat mat) {
    Mat result = Mat::zeros(mat.rows, mat.cols, CV_8UC1);
    for (int y = 0; y < mat.rows; y++) {
        for (int x = 0; x < mat.cols; x++) {
            result.at<Vec<uchar, 1>>(y, x)[0] = mat.at<Vec3b>(y, x)[0] * 0.2126 + mat.at<Vec3b>(y, x)[1] * 0.7152 + mat.at<Vec3b>(y, x)[2] * 0.0722;
        }
    }
    return result;
}

int main()
{
    Mat img = imread("C:\\Users\\PC\\Pictures\\1.jpg");
    imshow("原图", img);
    imshow("question_2", toGray(img));
    waitKey(0);
    destroyAllWindows();
}
Show
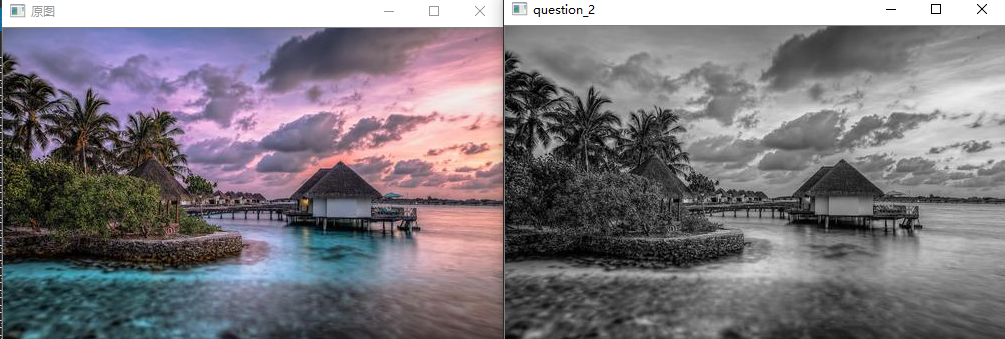
Note
可以直接调用封装好的函数
    Mat img = imread("C:\\Users\\PC\\Pictures\\1.jpg");
    Mat imgGray;
    cvtColor(img, imgGray, CV_RGB2GRAY);
问题三:二值化(Thresholding)
把图像进行二值化吧。
二值化是将图像使用黑和白两种颜色表示的方法。
我们将灰度的阈值设置为$128$来进行二值化,即:
$$
y=
\begin{cases}
0& (\text{if}\quad y < 128) \
255& (\text{else})
\end{cases}
$$
#include<opencv2\core\core.hpp>
#include<opencv2\highgui\highgui.hpp>
#include<opencv2\opencv.hpp>

using namespace cv;

Mat Thresholding(Mat mat) {
    Mat result = Mat::zeros(mat.rows, mat.cols, CV_8UC1);
    Mat grayImg = toGray(mat);//接上一问灰度化
    for (int y = 0; y < mat.rows; y++) {
        for (int x = 0; x < mat.cols; x++) {
            result.at<Vec<uchar, 1>>(y, x)[0] = mat.at<Vec<uchar, 1>>(y, x)[0] > 128 ? 255 : 0;
        }
    }
    return result;
}
Show
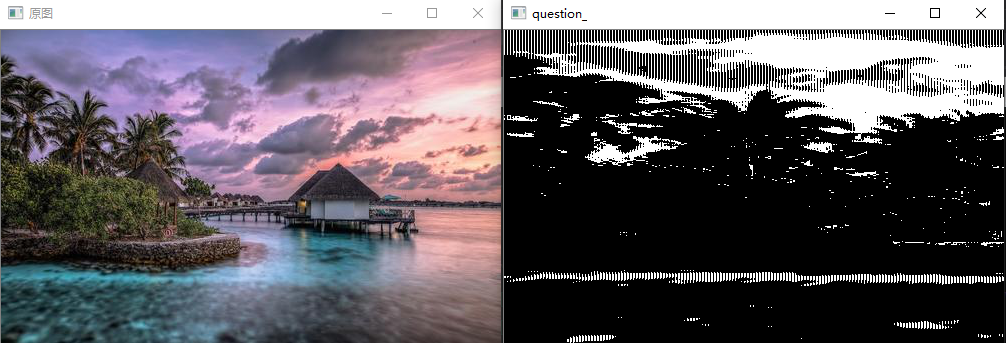
Note
可以使用 double cv::threshold( InputArray src, OutputArray dst,
double thresh, double maxval, int type );函数
@param src Source 8-bit single-channel image.
@param dst Destination image of the same size and the same type as src.
@param maxValue Non-zero value assigned to the pixels for which the condition is satisfied
@param adaptiveMethod Adaptive thresholding algorithm to use, see #AdaptiveThresholdTypes.
The #BORDER_REPLICATE | #BORDER_ISOLATED is used to process boundaries.
@param thresholdType Thresholding type that must be either #THRESH_BINARY or #THRESH_BINARY_INV,
see #ThresholdTypes.
@param blockSize Size of a pixel neighborhood that is used to calculate a threshold value for the
pixel: 3, 5, 7, and so on.
@param C Constant subtracted from the mean or weighted mean (see the details below). Normally, it
is positive but may be zero or negative as well.
问题四:大津二值化算法(Otsu's Method)
使用大津算法来二值化图像吧。
大津算法,也被称作最大类间方差法,是一种可以自动确定二值化中阈值的算法。
从类内方差和类间方差的比值计算得来:
- 小于阈值$t$的类记作$0$,大于阈值$t$的类记作$1$;
- $w_0$和$w_1$是被阈值$t$分开的两个类中的像素数占总像素数的比率(满足$w_0+w_1=1$);
- ${S_0}^2$, ${S_1}^2$是这两个类中像素值的方差;
- $M_0$,$M_1$是这两个类的像素值的平均值;
即:
- 类内方差:${S_w}^2=w_0\ {S_0}^2+w_1\ {S_1}^2$
- 类间方差:${S_b}^2 = w_0 \ (M_0 - M_t)^2 + w_1\ (M_1 - M_t)^2 = w_0\ w_1\ (M_0 - M_1) ^2$
- 图像所有像素的方差:${S_t}^2 = {S_w}^2 + {S_b}^2 = \text{常数}$
根据以上的式子,我们用以下的式子计算分离度$X$:1
$$ X = \frac{{S_b}^2}{{S_w}^2} = \frac{{S_b}^2}{{S_t}^2 - {S_b}^2} $$
也就是说:
\arg\max\limits_{t}\ X=\arg\max\limits_{t}\ {S_b}^2换言之,如果使${S_b}^2={w_0}\ {w_1}\ (M_0 - M_1)^2$最大,就可以得到最好的二值化阈值$t$。
Answer
Mat thresholding_OTSU(Mat mat) {
    int height = mat.rows;
    int width = mat.cols;
    Mat result = Mat::zeros(height, width, CV_8UC1);
    Mat grayImg = toGray(mat);
    double S_temp = 0.0;
    int degree_temp = 0;
    for (int grayDegree = 0; grayDegree < 255; grayDegree++) {
        double downNum = 0.0;//小于阈值的像素个数
        double downSum = 0.0;//小于阈值的像素灰度值总和
        double upNum = 0.0;//大于阈值的像素个数
        double upSum = 0.0;//大于阈值的像素灰度值总和
        for (int y = 0; y < mat.rows; y++) {
            for (int x = 0; x < mat.cols; x++) {
                uchar pix = grayImg.at<Vec<uchar, 1>>(y, x)[0];
                if ( pix< grayDegree) {
                    downNum++;
                    downSum += pix;
                }
                else{
                    upNum++;
                    upSum += pix;
                }
            }
        }
        double w_0 = downNum / (downNum + upNum);
        double w_1 = upNum / (downNum + upNum);
        double M_0,M_1 = 0.0;
        if(downNum>0)  M_0 = downSum / downNum; else  M_0 = 0.0;
        if (upNum > 0) M_1 = upSum / upNum; else M_1 = 0.0;
        double S = w_0 * w_1*(M_0 - M_1)*(M_0 - M_1);
        if (S > S_temp) {
            S_temp = S;
            degree_temp = grayDegree;
        }
    }
    return Thresholding(grayImg, degree_temp);
}
}
Show
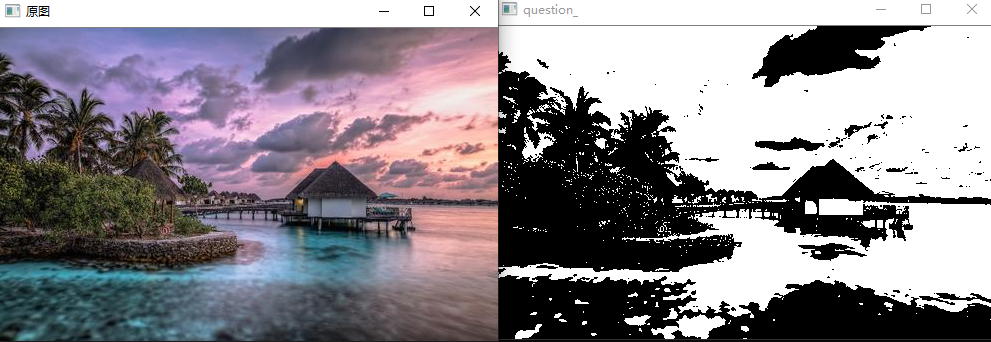
Note
问题五:$\text{HSV}$变换
将使用$\text{HSV}$表示色彩的图像的色相反转吧!
$\text{HSV}$即使用色相(Hue)、饱和度(Saturation)、明度(Value)来表示色彩的一种方式。
-
色相:将颜色使用$0^{\circ}$到$360^{\circ}$表示,就是平常所说的颜色名称,如红色、蓝色。色相与数值按下表对应:
红 黄 绿 青色 蓝色 品红 红 $0^{\circ}$ $60^{\circ}$ $120^{\circ}$ $180^{\circ}$ $240^{\circ}$ $300^{\circ}$ $360^{\circ}$ -
饱和度:是指色彩的纯度,饱和度越低则颜色越黯淡($0\leq S < 1$);
-
明度:即颜色的明暗程度。数值越高越接近白色,数值越低越接近黑色($0\leq V < 1$);
从$\text{RGB}$色彩表示转换到$\text{HSV}$色彩表示通过以下方式计算:
$\text{RGB}$的取值范围为$[0, 1]$,令:
$$
\text{Max}=\max(R,G,B)\
\text{Min}=\min(R,G,B)
$$
色相:
$$
H=\begin{cases}
0&(\text{if}\ \text{Min}=\text{Max})\
60\ \frac{G-R}{\text{Max}-\text{Min}}+60&(\text{if}\ \text{Min}=B)\
60\ \frac{B-G}{\text{Max}-\text{Min}}+180&(\text{if}\ \text{Min}=R)\
60\ \frac{R-B}{\text{Max}-\text{Min}}+300&(\text{if}\ \text{Min}=G)
\end{cases}
$$
饱和度:
$$
S=\text{Max}-\text{Min}
$$
明度:
$$
V=\text{Max}
$$
从$\text{HSV}$色彩表示转换到$\text{RGB}$色彩表示通过以下方式计算:
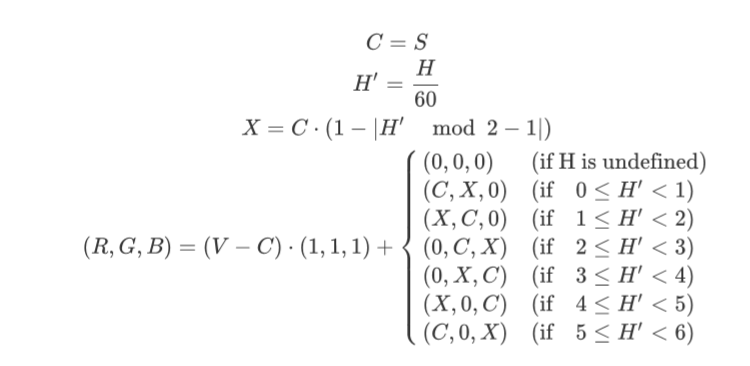
请将色相反转(色相值加$180$),然后再用$\text{RGB}$色彩空间表示图片。
Answer
void RGBToHSV(Mat src, Mat& dst) {
    int height = src.rows;
    int width = src.cols;

    dst = Mat::zeros(src.rows, src.cols, CV_32FC3);
    for (int x = 0; x < height; x++) {
        for (int y = 0; y < width; y++) {
            float r = (float)src.at<Vec3b>(x, y)[0]/255;
            float g = (float)src.at<Vec3b>(x, y)[1]/255;
            float b = (float)src.at<Vec3b>(x, y)[2]/255;
            float max = std::max(r, std::max(g, b));
            float min = std::min(r, std::min(g, b));
            float H = 0.0;
            if (max == min) H = 0.0;
            else if (min == b) H = (60.0*(g - r) / (max - min)) + 60.0;
            else if (min == r) H = (60.0*(b - g) / (max - min)) + 180.0;
            else if (min == g) H = (60.0*(r - b) / (max - min)) + 300.0;

            float S = (float)max - (float)min;

            float V = (float)max;

            dst.at<Vec3f>(x, y)[0] = H;
            dst.at<Vec3f>(x, y)[1] = S;
            dst.at<Vec3f>(x, y)[2] = V;
        }
    }
}
Show
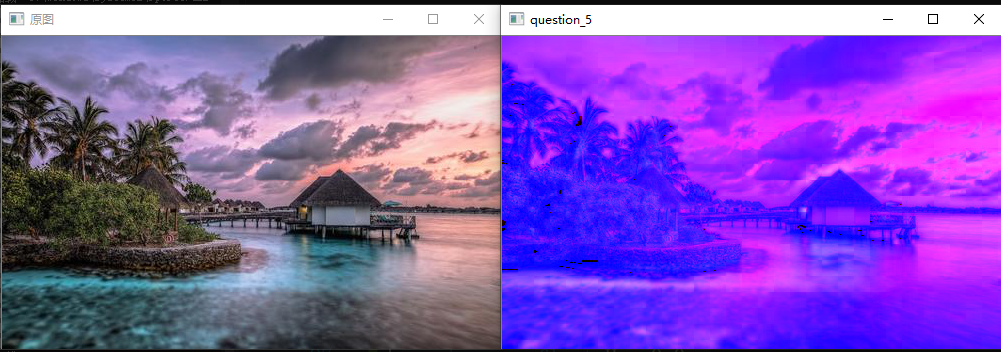
Note
可以使用自带的函数cv::cvtColor(src,dst,CV_RGB2HSV)处理
问题六:减色处理2
我们将图像的值由$256^3$压缩至$4^3$,即将$\text{RGB}$的值只取${32, 96, 160, 224}$。这被称作色彩量化。色彩的值按照下面的方式定义:
$$
\text{val}=
\begin{cases}
32& (0 \leq \text{var} < 64)\
96& (64\leq \text{var}<128)\
160&(128\leq \text{var}<192)\
224&(192\leq \text{var}<256)
\end{cases}
$$
Answer
void subColor(Mat src, Mat& dst) {
    int height = src.rows;
    int width = src.cols;
    dst = Mat::zeros(height, width, CV_MAKETYPE(8, 3));
    for (int x = 0; x < height; x++) {
        for (int y = 0; y < width; y++) {
            uchar r = src.at<Vec3b>(x, y)[0];
            uchar g = src.at<Vec3b>(x, y)[1];
            uchar b = src.at<Vec3b>(x, y)[2];
            dst.at <Vec<uchar, 3 >>(x, y)[0] = (r > 64) ? (r > 128 ? (r > 192 ? 224 : 160) : 96) : 32;
            dst.at <Vec<uchar, 3 >>(x, y)[1] = (g > 64) ? (g > 128 ? (g > 192 ? 224 : 160) : 96) : 32;
            dst.at <Vec<uchar, 3 >>(x, y)[2] = (b > 64) ? (b > 128 ? (b > 192 ? 224 : 160) : 96) : 32;
        }
    }
}
Show
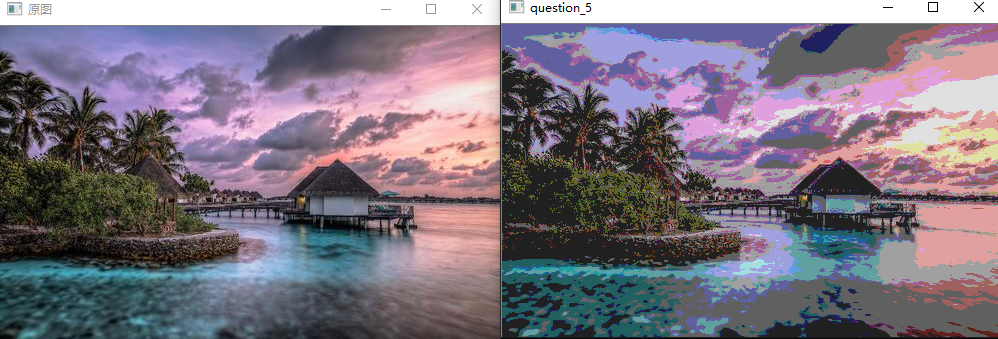
Note
预定义类型的结构如下所示:
CV_
1–bit_depth—比特数—代表8bite,16bites,32bites,64bites—举个例子吧–比如说,如
如果你现在创建了一个存储–灰度图片的Mat对象,这个图像的大小为宽100,高100,那么,现在这张
灰度图片中有10000个像素点,它每一个像素点在内存空间所占的空间大小是8bite,8位–所以它对
应的就是CV_8
2–S|U|F–S--代表—signed int—有符号整形
U–代表–unsigned int–无符号整形
F–代表–float---------单精度浮点型
3–C
1–灰度图片–grayImg—是–单通道图像
2–RGB彩色图像---------是–3通道图像
3–带Alph通道的RGB图像–是--4通道图像
问题七:平均池化(Average Pooling)
将图片按照固定大小网格分割,网格内的像素值取网格内所有像素的平均值。
我们将这种把图片使用均等大小网格分割,并求网格内代表值的操作称为池化(Pooling)。
池化操作是卷积神经网络(Convolutional Neural Network)中重要的图像处理方式。平均池化按照下式定义:
$$
v=\frac{1}{|R|}\ \sum\limits_{i=1}^R\ v_i
$$
请使用$8\times8$的网格做平均池化。
Answer
void AveragePooling(Mat src,Mat& dst) {
    int height = src.rows;
    int width = src.cols;
    int size = 8;
    dst = Mat::zeros(height, width, CV_8UC3);
    struct AssignColor
    {
    Scalar src;
    public:AssignColor(Scalar& src_) {
        src = src_;
    }

        void operator()(Vec3b& pixel, const int* position) const{
            pixel[0] = src[0];
            pixel[1] = src[1];
            pixel[2] = src[2];
        }
    };
    for (int x = 0; x < height- size; x+= size) {
        for (int y = 0; y < width- size; y+= size) {
            Mat conv = src(Rect( y, x, size, size)).clone();
            Scalar avg = mean(conv);
            Mat dstConv = dst(Rect(y, x, size, size));
            dstConv.forEach< Vec3b>(AssignColor(avg));
        }
    }
 }
Show
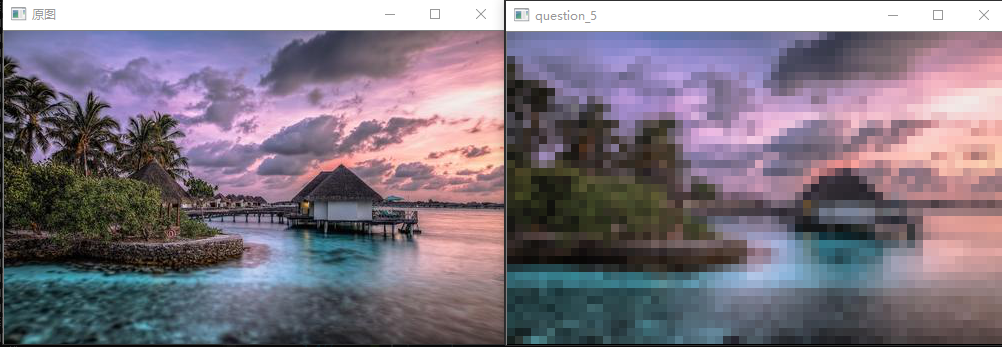
Note
-
对于提取Mat中的矩阵可以使用mat(Rect(x,y,height,width)),mat为Mat对象.该提取后的对象做修改会影响原始图像,新建副本要使用clone()
-
Mat对象中有forEach()方法,可以新建结构体,构造void operator()函数;函数定义如下:
template<typename _Tp, typename Functor> inline void Mat::forEach(const Functor& operation) { this->forEach_impl<_Tp>(operation); }_Tp是每个像素的数据类型,本题中使用的是Vec3b
结构体构建可以参考如下public:AssignColor(Scalar& src_) { src = src_; } void operator()(Vec3b& pixel, const int* position) const{ pixel[0] = src[0]; pixel[1] = src[1]; pixel[2] = src[2]; } };因为我要给每个循环传递参数所以给该结构体一个构造函数
-
注意上述结构体中
void operator()函数后面加的const关键词,非静态成员函数后面加const(加到非成员函数或静态成员后面会产生编译错误),表示成员函数隐含传入的this指针为const指针,决定了在该成员函数中,任意修改它所在的类的成员的操作都是不允许的(因为隐含了对this指针的const引用);唯一的例外是对于mutable修饰的成员。加了const的成员函数可以被非const对象和const对象调用,但不加const的成员函数只能被非const对象调用。
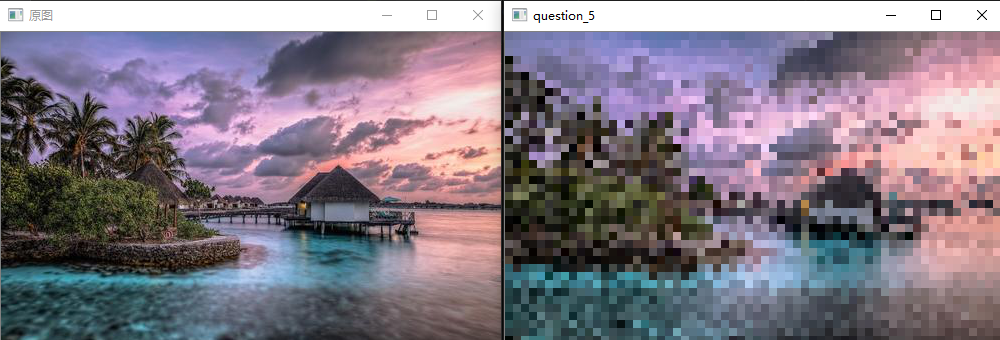
问题八:最大池化(Max Pooling)
网格内的值不取平均值,而是取网格内的最大值进行池化操作。
Answer
void MaxPooling(Mat src, Mat& dst) {
    int height = src.rows;
    int width = src.cols;
    int size = 8;
    dst = Mat::zeros(height, width, CV_8UC3);
    struct AssignColor
    {
        Vec3b src;
    public:AssignColor(Vec3b& src_) {
        src = src_;
    }

           void operator()(Vec3b& pixel, const int* position) const {
               pixel[0] = src[0];
               pixel[1] = src[1];
               pixel[2] = src[2];
           }
    };
    for (int x = 0; x < height - size; x += size) {
        for (int y = 0; y < width - size; y += size) {
            Mat channal[3];
            Mat conv = src(Rect(y, x, size, size)).clone();
            split(conv, channal);
            Point* maxIndex=new Point();
            minMaxLoc(channal[0], NULL, NULL, NULL, maxIndex);
            Mat dstConv = dst(Rect(y, x, size, size));
            dstConv.forEach< Vec3b>(AssignColor(conv.at<Vec3b>(maxIndex->x,maxIndex->y)));
        }
    }
}
Show
Note
这一题偷懒了,按照第一个通道的最大值位置为每个通道的最大值位置.
问题九:高斯滤波(Gaussian Filter)
使用高斯滤波器($3\times3$大小,标准差$\sigma=1.3$)来对imori_noise.jpg进行降噪处理吧!
高斯滤波器是一种可以使图像平滑的滤波器,用于去除噪声。可用于去除噪声的滤波器还有中值滤波器(参见问题十),平滑滤波器(参见问题十一)、LoG滤波器(参见问题十九)。
高斯滤波器将中心像素周围的像素按照高斯分布加权平均进行平滑化。这样的(二维)权值通常被称为卷积核(kernel)或者滤波器(filter)。
但是,由于图像的长宽可能不是滤波器大小的整数倍,因此我们需要在图像的边缘补$0$。这种方法称作Zero Padding。并且权值$g$(卷积核)要进行归一化操作($\sum\ g = 1$)。
按下面的高斯分布公式计算权值:
$$
g(x,y,\sigma)=\frac{1}{2\ \pi\ \sigma^2}\ e^{-\frac{x^2+y^2}{2\ \sigma^2}}
$$
标准差$\sigma=1.3$的$8-$近邻高斯滤波器如下:
$$
K=\frac{1}{16}\ \left[
\begin{matrix}
1 & 2 & 1 \
2 & 4 & 2 \
1 & 2 & 1
\end{matrix}
\right]
$$
Answer
void GaussianFilter(Mat src, Mat& dst, int kernel_size,float sigma) {
    int hetght = src.rows;
    int width = src.cols;
    dst = Mat::zeros(hetght, width, CV_8UC3);
    Mat kernel = Mat::zeros(kernel_size, kernel_size, CV_32F);
    const float pi = 3.1415926;

    //initKernel
    float kernelSum = 0.0;
    kernel.forEach<float>([&](float& item, const int* position) {
        int x = position[0]-(int)kernel_size/2;
        int y = position[1]- (int)kernel_size / 2;
        item = (1 / (2 * pi*sigma*sigma))*exp(-(x*x+y*y)/(2*sigma*sigma));
        kernelSum += item;
    });
    kernel.forEach<float>([&](float& item, const int* position) {
        item /= kernelSum;
    });
    std::cout << "\n" << sum << "\n";
    // filtering
    int channel = src.channels();
    for (int x = 0; x < hetght; x++) {
        for (int y = 0; y < width; y++) {
            for (int c = 0; c < channel; c++) {
                int v = 0;
                int pad = kernel_size / 2;
                for (int dx = -pad; dx < pad + 1; dx++) {
                    for (int dy = -pad; dy < pad + 1; dy++) {
                        if (((x + dx) >= 0) && ((y + dy) >= 0)) {
                            v += (double)src.at<cv::Vec3b>( x + dx, y + dy)[c] * kernel.at <float>(dx + pad, dy + pad);
                        }
                    }
                }
                dst.at<Vec3b>(x, y)[c] = v;
            }
        }
    }
}
Show
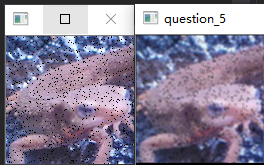
$\sigma=1.3$时的滤波效果
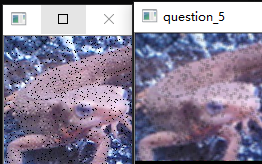
$\sigma=10$时的滤波效果

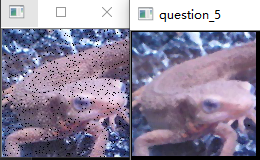
$\sigma=0.1$时的滤波效果
Note
-
在C++中的lambda表达式中,要使用外面的任意变量,可以用&{}的方式,&代表捕获所有局部变量。
-
可以调用函数GaussianBlur(src, GaussianBlurImg, Size(5, 5), 1, 1);
问题十:中值滤波(Median Filter)
使用中值滤波器($3\times3$大小)来对imori_noise.jpg进行降噪处理吧!
中值滤波器是一种可以使图像平滑的滤波器。这种滤波器用滤波器范围内(在这里是$3\times3$)像素点的中值进行滤波,请在这里也采用Zero Padding。
Answer
void MedianFilter(Mat src, Mat& dst, int pad_size) {
    if (!src.data) return;
    int height = src.rows;
    int width = src.cols;
    int channel = src.channels();
    dst = Mat::zeros(height + height, width + width, CV_8UC3);
    for (int x = 1; x < height - pad_size; x++) {
        for (int y = 1; y < width - pad_size; y++) {
            Mat pad = src(Rect(x-1, y-1, pad_size, pad_size));
            Mat chs[3];
            split(pad, chs);
            for (int c = 0; c < channel; c++) {
                Mat flut;
                chs[c].reshape(1, 1).copyTo(flut);
                sort(flut, flut,CV_SORT_EVERY_ROW + CV_SORT_ASCENDING);
                int mid = flut.at<Vec<uchar,1>>(0, (pad_size*pad_size) / 2)[0];
                dst.at<Vec3b>(y, x)[c] = mid;
            }
        }
    }
}
Show
Note
- 可以调用函数medianBlur(src, MedianBlurImg, 5);进行中值滤波
- 要对Mat进行降维可以使用mat.reshape()
太长了